
windows服务程序 系统托盘
Windows服务程序系统托盘控制指南
摘要
随着计算机技术的不断发展,Windows服务程序在后台运行的任务越来越多。为了方便用户对服务程序进行管理和控制,系统托盘成为了理想的操作界面。本文将详细介绍如何使用Windows服务程序系统托盘,帮助用户轻松管理后台服务。
一、什么是Windows服务程序系统托盘
系统托盘是位于计算机屏幕右下角的一个小区域,用于显示系统图标和通知。Windows服务程序系统托盘是指将服务程序的控制功能集成到系统托盘,用户可以通过系统托盘对服务程序进行启动、停止、暂停等操作。
二、创建Windows服务程序系统托盘
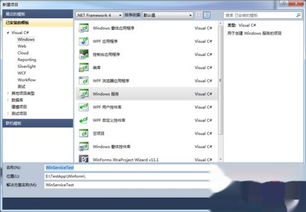
要创建Windows服务程序系统托盘,首先需要使用Visual Studio创建一个Windows服务程序。以下是一个简单的示例:
```csharp
using System;
using System.ServiceProcess;
namespace WindowsServiceSystemTray
public partial class Service1 : ServiceBase
{
public Service1()
{
InitializeComponent();
}
protected override void OnStart(string[] args)
{
// 在这里添加启动服务程序的代码
}
protected override void OnStop()
{
// 在这里添加停止服务程序的代码
}
}
接下来,需要添加系统托盘功能。这可以通过添加以下代码实现:
```csharp
using System;
using System.Windows.Forms;
namespace WindowsServiceSystemTray
public partial class Service1 : ServiceBase
{
private NotifyIcon notifyIcon;
public Service1()
{
InitializeComponent();
notifyIcon = new NotifyIcon();
notifyIcon.Text =